

TL;DR:
- Regular roof inspections after Chicago storms help identify hidden hail and wind damage early, preventing costly repairs. Proper documentation and professional evaluations ensure proper insurance claims and timely maintenance, reducing structural and health risks. Vigilant, ground-based inspections using binoculars and attic checks are essential for homeowner safety and effective damage assessment.
You pull into your driveway after a nasty Chicago storm, and that familiar knot forms in your stomach. Did the roof make it? You can’t tell just by looking from the car, but the cost of finding out the hard way months from now is far worse. Hail and wind damage often hides in plain sight, and Chicago’s volatile spring and summer storm seasons give your roof a serious workout every year. Catching small damage now can mean the difference between a minor repair bill and a full roof replacement.
Table of Contents
- What hail and wind do to Chicago roofs
- Tools and checklist: What you need before inspecting
- Step-by-step: How to spot damage early
- Verifying and documenting the damage
- The overlooked truth: Why early roof checks save you more than money
- Need a professional opinion? Book a Chicago home roof inspection
- Frequently asked questions
Key Takeaways
| Point | Details |
|---|---|
| Early checks matter | Spotting minor issues right after a storm can prevent expensive repairs later. |
| Know what to look for | Loose shingles and new water stains are key signs to check for after Chicago storms. |
| Safety first | Always inspect from the ground or indoors unless you are experienced and equipped for roof work. |
| Document all findings | Take photos and keep records for insurance claims and repair decisions. |
| Get professional help when needed | Calling a certified inspector ensures thorough, safe assessments after major Chicago storms. |
What hail and wind do to Chicago roofs
Now that you know the risks, it’s important to understand exactly how storms impact your roof. Chicago sits in a region where severe hail events hit multiple times per season, and wind gusts during thunderstorms regularly exceed 50 miles per hour. That combination puts enormous stress on residential roofs year after year.
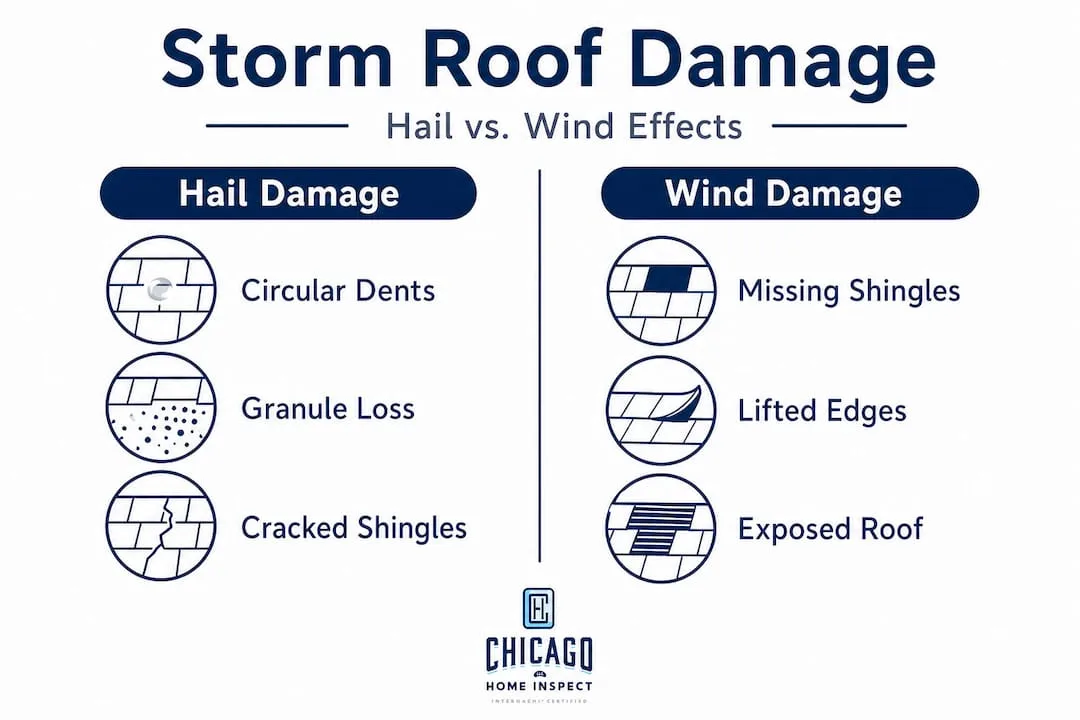
How hail damages shingles is often more subtle than people expect. Large hailstones leave obvious dents or cracks, but hail in the half-inch to one-inch range, which is very common in Illinois, causes “bruising” on asphalt shingles. This bruising breaks down the protective granule layer on the shingle surface. Once those granules are gone, the underlying asphalt is exposed to UV rays, temperature swings, and moisture. Over time, the shingle becomes brittle and cracks. You can review a hail inspection checklist to understand exactly what inspectors look for when assessing this type of damage.
Wind damage works differently. It focuses on the edges, ridges, and any pre-existing weak spots on your roof. When wind lifts a shingle corner or pulls a nail loose, it creates an opening. Rain then drives underneath that shingle, soaking the wooden decking below. Repeated wetting and drying cycles lead to wood rot and eventually structural weakening. Wind damage insurance claims are among the most disputed because the entry point for water can be far from where the ceiling stain appears inside your home.
What makes Chicago conditions especially tough is the freeze-thaw cycle. A storm in late April can leave water under a damaged shingle, and if temperatures drop overnight, that water expands as ice and forces the crack wider. This is a damage pattern unique to northern climates, and it accelerates the timeline from small problem to big repair. The Chicago weather roof impact on older homes can be severe enough to require repairs far sooner than the manufacturer’s warranty would suggest.
Leaks and loose or damaged shingles are among the most common warning signs after heavy rain, and identifying these early can help prevent structural issues from developing.
The tricky part is that hail and wind damage is far harder to spot than age-related wear or sun damage. Older shingles crack uniformly and you can see the curling from the ground. Hail damage looks almost random, and wind damage might be a single loose tab in an otherwise perfect-looking roof. Here is a comparison of the two main damage types:
| Damage type | What it looks like | Where to look first |
|---|---|---|
| Hail damage | Circular dents, missing granules, dark bruise spots | Flat areas of shingles, ridge caps, gutters |
| Wind damage | Lifted or missing shingles, cracked edges, exposed nails | Roof edges, ridges, corners, flashing seams |
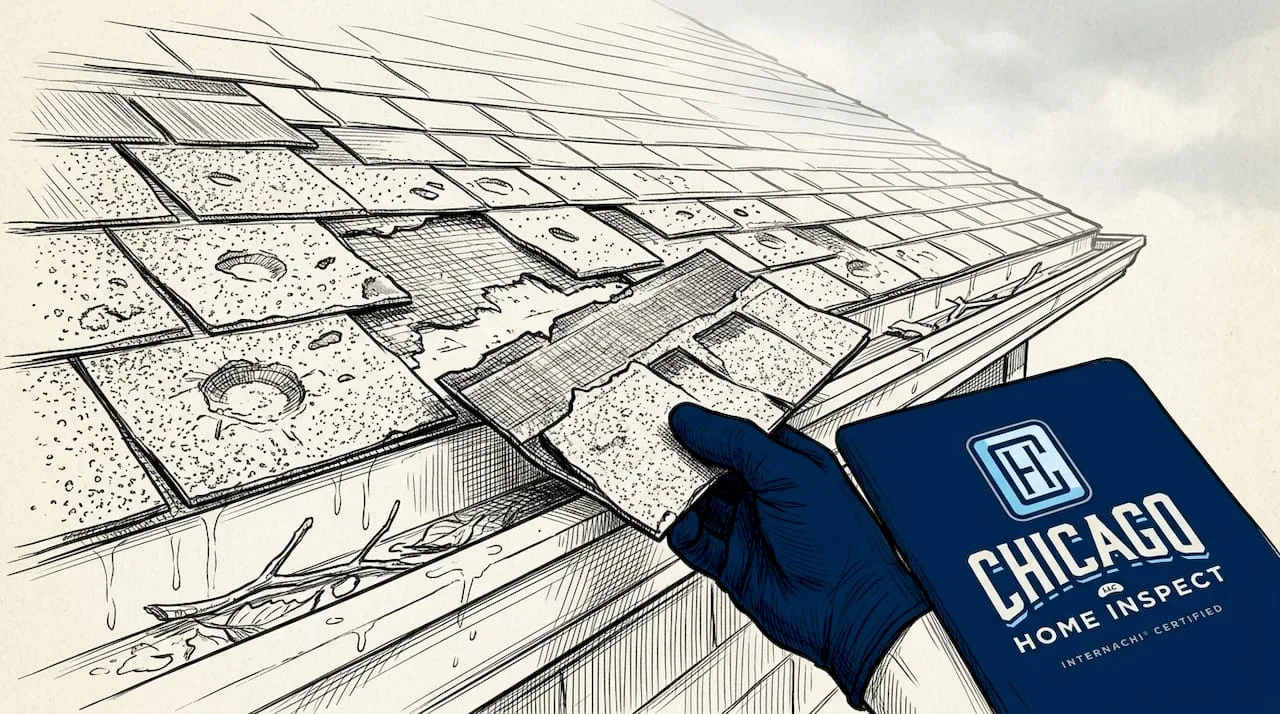
For a broader picture of how storm damage fits into common roof problems that Chicago inspectors find regularly, it helps to know that roof-related defects consistently rank at the top of inspection reports in this market.
Tools and checklist: What you need before inspecting
Before you step outside, make sure you’re ready with the right tools and safety steps. A proper ground-level inspection does not require you to climb your roof. In fact, for most Chicago homeowners on a two-story home with a steeply pitched roof, staying on the ground is the correct and safest approach.
Basic tools you will want on hand:
- Binoculars (10x magnification is ideal for reading shingle condition from the ground)
- A smartphone or camera with a zoom lens for documentation photos
- A flashlight for checking the attic from inside
- A notepad or a notes app to log what you find and where
- A ladder, only if you are inspecting gutters at a single-story level and conditions are dry
Safety reminders before you start:
- Never inspect in wet, icy, or windy conditions
- Do not walk on the roof after a major hail storm because the granule loss makes shingles slippery
- Keep your feet on the ground if the pitch of your roof is steep (above a 6:12 slope, meaning it rises 6 inches for every 12 inches of horizontal run)
- Tell someone you are doing the inspection, especially if you plan to use a ladder
Roof maintenance after storms often starts with knowing what you’re looking for before you even go outside. Reviewing your previous inspection reports or photos from last year gives you a baseline so you know what is new versus what was already there. This matters a lot when dealing with insurance adjusters.
Non-shingle warning signs like water stains on ceilings or loose shingles in the yard are often the first clues homeowners notice, and minor issues like these can persist and worsen over time if ignored.
One frequently overlooked preparation step is checking your documentation from any previous home inspection. Many of the overlooked inspection defects in Chicago homes are roof-related items that were minor at the time of purchase but became serious after a few storm seasons went by without follow-up.
Pre-inspection checklist:
- Review any previous inspection reports for noted roof conditions
- Check the attic the night of or day after a storm for any new moisture or drips
- Walk the yard to look for granules, shingle pieces, or debris from the roof
- Note the date and storm details for your records
Pro Tip: Take time-stamped photos from the same spots every year. Stand at the four corners of your property and shoot toward the roof. This creates a visual timeline that is extremely useful if you ever need to show an insurance adjuster exactly when damage appeared.
Step-by-step: How to spot damage early
With the tools and checklist ready, follow these steps to examine your roof and interior. This process moves from the ground up, which is the safest sequence and also the most logical because exterior damage is usually where the problem starts.
Walk the perimeter of your home. Look along the gutters and downspouts for an accumulation of dark, sandy granules. A little granule loss is normal over time, but large amounts after a single storm mean the hail impact was significant. Also look for any visible shingle pieces on the ground or in landscaping beds.
Use binoculars to scan shingle surfaces. Focus on the flat portions of shingles, the ridge cap, and the areas around any vents or chimneys. Look for color inconsistencies, which often indicate bruising, and for any spots where the shingle texture looks flat or dull compared to surrounding areas.
Inspect the flashing around chimneys, skylights, and pipe vents. Flashing is the metal material that seals the gap between your roof and any protrusion. Wind can bend or lift flashing, and once it is no longer making tight contact with the roof deck, water gets in. This is one of the most common entry points for leaks in Chicago homes.
Check gutters for dents and debris. Aluminum gutters dent when hit by large hailstones. If your gutters are dented on the exposed faces, your shingles almost certainly took similar impacts. Also look for granule buildup inside gutters, which confirms significant granule loss from shingles.
Go into the attic with a flashlight. Check the underside of the roof decking for any daylight coming through, any new wet spots, or dark discoloration that indicates moisture has been present. Run your hand along the decking in areas below the ridge and near any roof penetrations.
Inspect your interior ceilings and walls. Pay particular attention to rooms on the top floor and to any areas below a valley on the roof. Look for yellow or brown rings, soft spots in drywall, or bubbling paint. These are signs that water has already made it past the shingles.
Identifying early signs of loose or damaged shingles and leaks helps prevent structural issues that can cost significantly more to repair after prolonged water intrusion.
When you find something that looks off, review the insurance inspection checklist to understand what level of documentation an adjuster will expect. Knowing the standards ahead of time means you gather the right evidence the first time.
Keep a close eye on the major inspection red flags that inspectors in Chicago commonly flag during buyer inspections. Many of those same red flags apply to any storm damage situation, and knowing them makes you a sharper observer.
Pro Tip: If you spot something questionable but are not sure if it is new damage or old wear, photograph it and immediately check your pre-storm photos for the same area. The comparison will often be decisive.
Verifying and documenting the damage
After a walk-through for visible signs, proper documentation makes a difference with repairs and insurance. What you find during your inspection is only as useful as how well you record it.
Documentation steps that matter most:
- Take wide-angle photos first to establish location context, then close-up photos of specific damage
- Record the date, time, and name of the storm or weather event if it was named or reported locally
- Note the exact locations on the roof using compass direction and reference points like chimneys or vents
- Collect any physical debris, such as shingle pieces or dented vent caps, and keep them as physical evidence
- Check your neighbors’ roofs visually. If multiple homes on your block show damage, that supports your claim that a single storm event was responsible
Insurance companies look for documentation that clearly ties your damage to a specific event. Evidence for roof claims needs to be specific and timestamped. Vague descriptions without visual records are a common reason claims get reduced or denied.
Certain situations call for immediate professional help rather than further DIY investigation. If you see active water dripping into your attic, if ceiling drywall is sagging or wet to the touch, or if you notice any daylight through the roof deck in your attic, those are signs that structural risk may be present. Do not wait.
Understanding roof flashing prevention is particularly relevant here because flashing failures are often the hidden cause of interior water damage that gets attributed to shingles. Knowing whether flashing is involved changes both the repair scope and the documentation approach.
Leaks and damaged shingles that go unaddressed after storms are consistently linked to escalating structural repair costs, which is exactly why documentation and fast action go hand in hand.
Pro Tip: Consider scheduling a home inspection consultation before filing an insurance claim if you are unsure whether what you found qualifies as storm damage. A certified inspector’s written report carries significant weight with adjusters and can prevent your claim from being dismissed as pre-existing wear.
The overlooked truth: Why early roof checks save you more than money
Here is what most articles do not say directly. The average Chicago homeowner who ignores roof inspection after a storm is not just risking a bigger repair bill. They are accepting months of silent stress, wondering if that small ceiling mark is spreading, if the next rainstorm will make things worse, and whether they can sell the house without a problem surfacing.
The “out of sight, out of mind” mindset is particularly risky here because Chicago storm seasons do not give roofs a long break. A roof that takes hail damage in May and is not checked until September has sat through an entire summer of heat cycling and two or three more storms. What might have been a granule replacement or a shingle patch in May could be a decking repair and interior water remediation by fall.
There is also a health component that gets very little attention. Water intrusion through a damaged roof almost always creates moisture in the attic or wall cavities. In a Chicago climate, where homes are sealed tight for heating season, that trapped moisture becomes a mold risk faster than most homeowners expect. Mold that starts in the attic after a summer roof leak can be sitting quietly while you run your furnace all winter, pushing air through a contaminated space. The weather-related inspection advice we share consistently points to this moisture-to-mold pipeline as one of the most underappreciated consequences of delayed roof checks.
The mental relief of knowing your roof is sound after a major storm is genuinely valuable. Proactive inspections give you either confirmation that things are fine or a clear starting point for action. Both outcomes are better than uncertainty.
Need a professional opinion? Book a Chicago home roof inspection
For complete peace of mind and thorough documentation, professional help is a smart next step after any significant storm. Our team at Chicago Home Inspection Services is InterNACHI certified, fully licensed and insured, and available on weekends to fit your schedule. We inspect roofs and exteriors thoroughly, documenting every finding with photos and clear descriptions. You can see exterior inspection photos from real Chicago homes to understand the level of detail we bring to every inspection. If your roof inspection reveals moisture intrusion, we also offer mold testing for homes to catch any secondary problems before they become health concerns. Call us or book online and let a certified professional give you the documentation you need.
Frequently asked questions
What are the first signs of hail or wind roof damage I can spot?
Look for loose or missing shingles, granule buildup in gutters, and any new water stains on ceilings. Leaks and loose shingles are the most common post-storm warning signs and catching them early prevents structural damage.
Should I go onto the roof myself after hail or wind storms?
Inspect from the ground using binoculars or from inside the attic first. Never climb onto the roof after a storm unless you are trained and surface conditions are completely dry and safe.
How soon after a storm should I check my roof?
Check as soon as weather conditions are safe, ideally within 24 to 48 hours. Identifying roof issues early is the best way to prevent minor damage from becoming a structural problem over the following weeks.
Is hail damage covered by insurance in Chicago?
Most homeowner policies cover sudden storm-related hail damage, but coverage specifics vary. Review your policy carefully and document all damage before contacting your insurer.
What should I do if I find water stains on my ceiling after a storm?
Contact a professional inspector right away to identify the source and get repairs moving. Water stains signal roof weaknesses that will worsen with every subsequent storm if left unaddressed.
Recommended
- How Chicago Weather Damages Homes & What to Inspect
- Winter Home Maintenance List to Prevent Damage in Chicago | Chicago Home Inspect LLC
- Roof Flashing: Preventing Costly Damage in Chicago | Chicago Home Inspect LLC
- 7 Major Home Inspection Red Flags Chicago Buyers Must Know | Chicago Home Inspect LLC