Mold can sneak into homes all across Chicago, posing a threat to both your lungs and your walls. Most people think a quick wipe-down is all it takes, but that almost always leads to the mold coming back stronger. Here is the kicker: keeping indoor humidity between 30 and 50 percent cuts down the risk of mold by more than half. That simple change can save you endless trouble and repairs in the months ahead.
Table of Contents
- Step 1: Assess The Mold-Affected Areas
- Step 2: Gather Necessary Cleaning Supplies
- Step 3: Prepare The Area For Cleaning
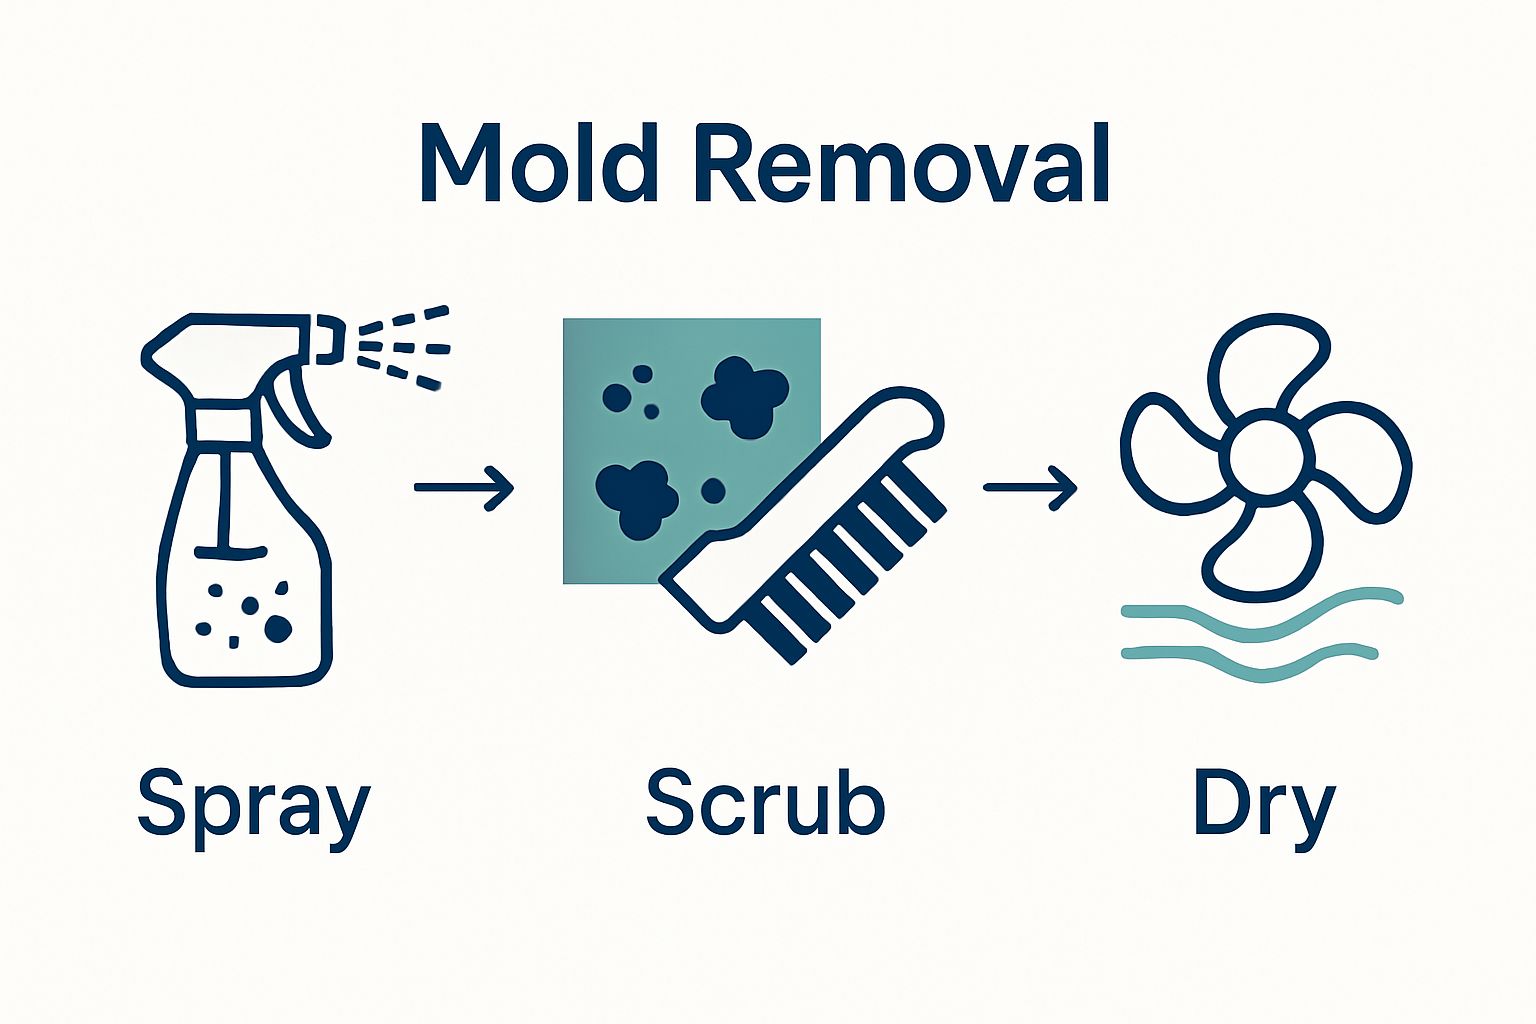
- Step 4: Apply Mold Removal Solution
- Step 5: Scrub And Remove Mold Thoroughly
- Step 6: Verify And Monitor For Future Growth
Quick Summary
| Key Point | Explanation |
|---|---|
| 1. Conduct a thorough mold assessment | Perform a visual inspection in damp areas to identify mold signs like discoloration or musty odors. |
| 2. Use proper protective gear | Prioritize safety with gloves, goggles, and masks to avoid exposure to mold spores and cleaning chemicals. |
| 3. Isolate the affected area | Seal off contaminated spaces with plastic sheeting to prevent mold spores from spreading during cleanup. |
| 4. Apply effective cleaning solutions | Choose appropriate mold removal products based on surface type and ensure to follow application guidelines for maximum efficacy. |
| 5. Monitor for recurring mold growth | Regularly inspect cleaned areas and maintain humidity levels to prevent future mold infestations in your home. |
Step 1: Assess the Mold-Affected Areas
Mold detection is a critical first step in protecting your Chicago home from potential health risks and structural damage. Understanding the extent and location of mold growth requires a systematic and thorough approach. Proper assessment helps homeowners determine the severity of the problem and develop an effective removal strategy.
Begin your assessment by conducting a comprehensive visual inspection of areas prone to moisture and potential mold growth. Focus on spaces like basements, bathrooms, kitchens, and areas around windows where condensation frequently occurs. Look for visible signs such as discoloration, dark spots, or fuzzy patches on walls, ceilings, floors, and hidden corners. Pay special attention to regions that have experienced water damage or persistent humidity.
Learn more about mold testing in your home to understand the nuanced indicators of mold presence. Some mold growth might be subtle and require careful examination. Use a bright flashlight to illuminate dark spaces and inspect behind furniture, inside cabinets, and beneath sinks. Check areas with previous water leaks or areas with poor ventilation, which are prime breeding grounds for mold spores.
Key indicators that warrant immediate attention include:
- Musty or earthy odors in specific rooms
- Visible water stains or discoloration on surfaces
- Peeling wallpaper or bubbling paint
- Dark or greenish-black spots on walls or ceilings
- Unexplained respiratory issues among household members
If you suspect extensive mold growth or are unsure about the extent of contamination, consider hiring a professional home inspector. In the Chicago area, experts can provide detailed mold testing and assessment services that go beyond a simple visual inspection. They utilize specialized equipment to detect hidden mold and measure moisture levels in your home’s structure.
Remember that early detection is crucial. The sooner you identify and address mold issues, the easier and less expensive the remediation process will be. Take detailed notes and photographs during your assessment to track the mold’s location and potential spread.
The following table provides a simple overview of the mold removal process steps, detailing each step’s main goal and what successful completion looks like.
| Step | Main Goal | Success Criteria |
|---|---|---|
| Assess Mold-Affected Areas | Identify all visible and hidden mold | All problem areas located and documented |
| Gather Necessary Cleaning Supplies | Prepare proper tools and safety gear | Supplies organized, PPE ready |
| Prepare the Area for Cleaning | Isolate to prevent spore spread | Area sealed off, ventilation set up |
| Apply Mold Removal Solution | Treat mold with appropriate product | Solution applied evenly per guidelines |
| Scrub and Remove Mold Thoroughly | Eliminate visible mold and residues | Surfaces visibly clean and residue-free |
| Verify and Monitor for Future Growth | Confirm removal, prevent recurrence | Area remains dry and mold-free |
Step 2: Gather Necessary Cleaning Supplies
Preparing for mold removal requires careful selection of the right tools and protective equipment. Proper preparation can mean the difference between a successful cleanup and potential health risks. Before you start tackling mold in your home, assembling a comprehensive set of cleaning supplies and safety gear is crucial.
According to EPA guidelines for mold cleanup, personal protection should be your first priority. Start by acquiring high-quality protective equipment that shields you from mold spores and harsh cleaning chemicals. This includes disposable gloves made from nitrile or rubber, safety goggles that create a complete seal around your eyes, and an N-95 respirator mask to prevent inhalation of potentially harmful spores.
Explore our comprehensive mold testing guide to understand the importance of thorough preparation. For cleaning solutions, you have several effective options. White vinegar offers a natural, non-toxic approach for small mold areas. Commercial mold removers provide stronger chemical solutions for more extensive growth. Alternatively, create a cleaning mixture using household bleach diluted with water, though this method works best on non-porous surfaces.
Essential supplies for your mold removal kit include:
- Spray bottles for cleaning solutions
- Scrub brushes with stiff bristles
- Disposable sponges and cleaning cloths
- Plastic garbage bags for contaminated materials
- Paper towels or disposable rags
- Protective drop cloths to contain the work area
Additional tools like a dehumidifier and fans can help dry the area after cleaning, preventing future mold growth. Consider having a few plastic containers with tight-fitting lids to seal and dispose of moldy materials safely. Remember to work in a well-ventilated space and have a plan for properly discarding contaminated cleaning materials to prevent cross-contamination.
By meticulously gathering your supplies before starting the mold removal process, you’ll ensure a more efficient and safer cleaning experience. Take time to organize your materials and verify you have everything needed to complete the job thoroughly and safely.
Below is a summary table of essential tools and cleaning supplies needed for safe and effective mold removal, along with their specific purposes.
| Supply / Tool | Purpose |
|---|---|
| Nitrile or rubber gloves | Protect hands from mold and chemicals |
| Safety goggles | Shield eyes from spores and splashes |
| N-95 respirator mask | Prevent inhalation of mold spores |
| Spray bottles | Apply cleaning solutions to affected areas |
| Scrub brushes (stiff) | Remove mold from surfaces |
| Sponges and cleaning cloths | Wipe residues and dry surfaces |
| Plastic garbage bags | Dispose of contaminated materials safely |
| Paper towels/disposable rags | Absorb moisture and assist with cleanup |
| Plastic drop cloths/sheeting | Contain area, protect flooring and objects |
Step 3: Prepare the Area for Cleaning
Preparing the area for mold removal is a critical step that can significantly impact the effectiveness of your cleaning efforts and prevent potential cross-contamination. Proper area preparation protects your home and health by minimizing the spread of mold spores during the cleaning process. This stage requires careful planning and strategic isolation of the affected space.
According to EPA guidelines for mold cleanup, containment is your primary objective. Begin by completely clearing the area of furniture, decorative items, and other movable objects. If certain items cannot be removed, cover them thoroughly with plastic sheeting to prevent contamination. In Chicago homes, where older buildings might have more complex structural layouts, pay extra attention to adjacent rooms and shared walls that could be impacted.
Learn more about preventing mold spread to understand the importance of comprehensive preparation. Create a strategic workspace by sealing off the affected area from the rest of your home. Use plastic sheeting and painter’s tape to create an effective barrier, ensuring that mold spores cannot drift into uncontaminated spaces. Open windows for ventilation, but close interior doors to prevent air circulation that might spread mold.
Key preparation steps include:
- Turn off HVAC systems to prevent spore circulation
- Remove or cover electrical outlets and light switches
- Place a box fan near an open window facing outward to help expel airborne spores
- Lay down plastic drop cloths to catch debris and protect flooring
- Have trash bags ready for immediate disposal of contaminated materials
Consider the temperature and humidity in the room. Mold thrives in damp, warm environments, so use a dehumidifier or fan to create less hospitable conditions. If possible, choose a time of day with lower humidity to begin your cleaning process. Wear your protective gear throughout the preparation, including your respirator mask, to minimize direct exposure to mold spores.
By meticulously preparing the area, you create a controlled environment that makes mold removal safer and more effective. Take your time with this step, as thorough preparation can significantly reduce potential health risks and improve your overall cleaning outcome.
Step 4: Apply Mold Removal Solution
Applying the right mold removal solution requires precision, care, and a strategic approach. The effectiveness of your cleaning depends not just on the solution, but on how you apply it and treat the affected surface. Different surfaces and types of mold demand specific treatment methods to ensure complete removal and prevent future growth.
According to EPA guidelines for mold cleanup, selecting the appropriate cleaning method is crucial. For non-porous surfaces like tiles, glass, and metal, create a solution of warm water and detergent or use a commercial mold removal product. Spray the solution directly onto the affected area, allowing it to sit for several minutes to break down the mold’s structure. Use a stiff-bristled brush to scrub the surface thoroughly, working from the outer edges toward the center to prevent spreading spores.
Learn more about preventing mold growth to understand the nuances of effective cleaning. Porous materials like drywall, carpeting, and fabric often require more aggressive treatment. In these cases, you might need to remove and replace the contaminated materials entirely, as mold can penetrate deep into these surfaces. If the affected area is small, carefully cut out the section and replace it with new material.
Important application techniques include:
- Apply cleaning solution in a consistent, even spray
- Work in small, manageable sections
- Use circular scrubbing motions to lift mold effectively
- Avoid oversaturating surfaces to prevent additional moisture damage
While white vinegar and hydrogen peroxide can be effective natural alternatives, commercial mold removers often provide more comprehensive treatment. For extensive mold growth, consider using a specialized anti-fungal solution that not only removes existing mold but also creates a protective barrier against future growth. Always test your chosen solution on a small, inconspicuous area first to ensure it doesn’t damage the surface.
After application, allow the surface to dry completely.
Use fans or dehumidifiers to expedite the drying process and prevent moisture buildup that could lead to recurring mold problems. Thorough drying is essential in completing the mold removal process and protecting your home from future infestations.
Step 5: Scrub and Remove Mold Thoroughly
Scrubbing and removing mold requires methodical technique and careful attention to detail. Physical removal of mold is more than just surface cleaning – it’s about completely eradicating potential regrowth and preventing future contamination. Your goal is to eliminate every visible trace of mold while minimizing the risk of spreading spores during the cleaning process.
According to EPA guidelines for mold cleanup, thorough scrubbing is essential for effectively removing mold colonies. Start by using a stiff-bristled brush with your prepared cleaning solution, applying firm but controlled pressure. Work systematically, beginning at the outer edges of the affected area and moving inward to prevent spore dispersion. For hard surfaces like tile or glass, use circular scrubbing motions that lift and remove the mold completely.
Understand more about mold testing techniques to recognize the importance of comprehensive cleaning. Different surfaces require unique approaches. Porous materials like drywall or wood might need more aggressive treatment or potential replacement. When scrubbing, maintain consistent pressure and overlap your cleaning strokes to ensure no areas are missed. Pay special attention to textured surfaces where mold can hide in small crevices and recesses.
Key scrubbing strategies include:
- Use disposable scrub brushes to prevent cross-contamination
- Rinse your brush frequently in clean water
- Change cleaning cloths or sponges often during the process
- Work in well-ventilated areas to minimize spore concentration
- Wear protective gloves and a respirator mask throughout scrubbing
After initial scrubbing, wipe the area with clean, damp cloths to remove any remaining cleaning solution and loose mold particles. For wooden surfaces, consider using a specialized wood cleaner that can penetrate deeper and prevent future mold growth. Some Chicago homes, especially older buildings, might have unique architectural features that require extra care during mold removal.
Verify your cleaning effectiveness by carefully inspecting the area after it has completely dried. The surface should appear clean, with no visible discoloration or dark spots. If any mold remains, repeat the cleaning process, ensuring you address the underlying moisture issue that initially caused the mold growth.
Step 6: Verify and Monitor for Future Growth
After cleaning, verifying the effectiveness of your mold removal and establishing ongoing monitoring is crucial for long-term home health. Successful mold remediation isn’t just about removing visible growth, but preventing future infestations and understanding the underlying environmental conditions that promote mold development. Your vigilance during this stage can save significant time and money in future repairs.
According to EPA guidelines for mold prevention, periodic inspection is essential for maintaining a mold-free environment. Begin by thoroughly examining the cleaned area under bright, natural light. Look for any remaining discoloration, unusual texture, or subtle signs of potential regrowth. Use a bright flashlight to illuminate corners, edges, and less visible surfaces where mold might re-emerge.
Explore our comprehensive mold testing techniques to understand the nuanced approach to long-term prevention. In Chicago’s variable climate, where humidity and temperature can fluctuate dramatically, monitoring becomes even more critical. Install a humidity meter to track moisture levels, keeping indoor humidity between 30-50%. This range significantly reduces the likelihood of mold regeneration.
Key monitoring strategies include:
- Conduct monthly visual inspections of previously affected areas
- Use a moisture meter to track potential problem zones
- Maintain proper ventilation in bathrooms, kitchens, and basements
- Address any water leaks or condensation immediately
- Consider professional mold testing annually
Document your cleaning process by taking before and after photographs. These can serve as a baseline for future comparisons and help you track any subtle changes. Pay special attention to areas with previous moisture issues, such as around windows, under sinks, and near plumbing fixtures. Chicago’s older homes often have unique architectural features that can trap moisture, so be extra diligent in these spaces.
Successful verification means the cleaned area remains dry, shows no visible mold growth, and maintains consistent indoor humidity levels. If you notice any recurring moisture or suspect new mold growth, consider consulting a professional home inspector who can provide a comprehensive assessment and preventative recommendations.
Protect Your Home and Health with Professional Mold Solutions
If you are feeling overwhelmed by the sight of mold or unsure whether your efforts are truly keeping your family safe, you are not alone. Mold issues create stress and uncertainty, especially after you have worked hard to follow each step in the cleaning process. But home mold problems can run deeper than what is visible and might require the insight of a licensed professional. Chicago’s changing seasons and older homes make recurring mold and hidden moisture a real concern for many property owners.
Take control of your home’s health today. With our InterNACHI certified and BBB accredited inspection team, you can address the root causes of mold, gain peace of mind, and prevent future damage. Schedule a specialized mold testing service or arrange a yearly home checkup directly with our friendly experts in the Chicago area. Act now and get the thorough support and advice you need. Visit Chicago Home Inspector to book your professional inspection and safeguard your property against mold challenges.
Frequently Asked Questions
What are the first steps to take when I suspect mold in my home?
Begin by conducting a comprehensive visual inspection of areas prone to moisture, such as basements, bathrooms, and kitchens. Look for visible signs like discoloration or musty odors. If extensive mold is suspected, consider hiring a professional for a detailed assessment.
What supplies do I need for mold removal?
Gather personal protective equipment such as gloves, goggles, and an N-95 respirator mask. Additionally, you’ll need cleaning solutions (like vinegar or bleach), scrub brushes, plastic garbage bags, and plastic sheeting to contain the area.
How do I effectively apply a mold removal solution?
For non-porous surfaces, spray a cleaning solution directly on the affected area and let it sit for a few minutes before scrubbing with a stiff-bristled brush. For porous materials, you may need to remove and replace the material entirely.
How can I prevent mold from returning after removal?
Ensure thorough drying of cleaned areas using fans or dehumidifiers. Maintain low indoor humidity levels between 30-50%. Regularly inspect previously affected areas and address any moisture problems immediately.